
Intacct puts many powerful tools at your disposal; two in particular stand out as powerhouse customization utilities – Smart Rules and Smart Events. Today we’ll be looking at Smart Events and what they can do for your organization.
Smart Events are often used by Third Party developers to trigger Adds/Updates/Deletions in their external systems. For example, if a customer’s address changes in Intacct, a Smart Event can then trigger an HTTP Post to your CRM’s website to make changes to the customer record in CRM via its web services layer. Smart Events can even use Intacct’s own internal API to add functionality and improve workflows. Finally, the simplest (but still very powerful) way a Smart Event can be used is to automatically email a person (or a group of people) if a certain action is performed and condition met.
When creating Smart Events (just like Smart Rules) a straight-forward, four step wizard guides you through the process.
Note: A Smart Event is triggered at the time an entry is saved. So do not expect an email (or other action) to happen until you Add, Modify (Set), or Delete that record.
---------------
Let’s walk through a simple example you can try on your own Intacct instance to have the system notify you via email every time a new GL account is added. You need to be logged in as an administrator in order to add Smart Events.
1. Go to General Ledger > Accounts list:
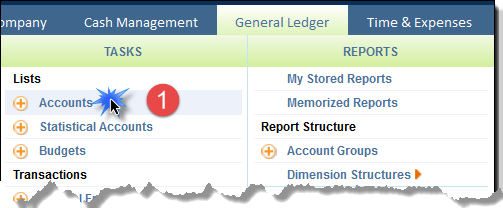
2. Click on the Object Definition link at the top-right of the screen:
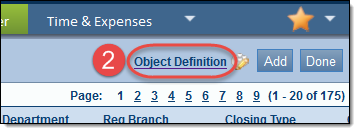
3. Scroll down to the section (near the bottom) called “Smart Events”. Click on the “New Smart Event” link:

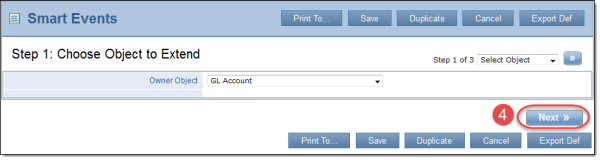
4. You are taken to Step 1 of the Smart Events wizard. Since we started in the GL Accounts object definition, the system fills in the Owner Object field for you. Since this information is correct, we are creating a Smart Event on the GL Account object, we can simply click Next:
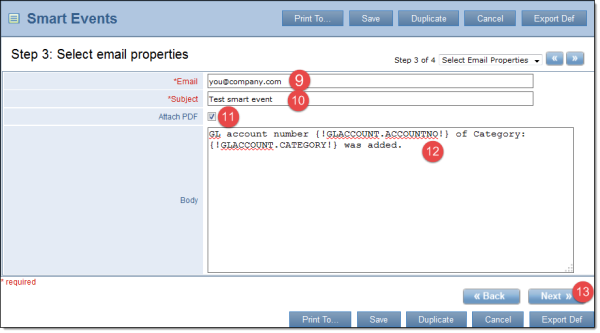
5. On the Step 2 of the wizard, change the Action to Email:
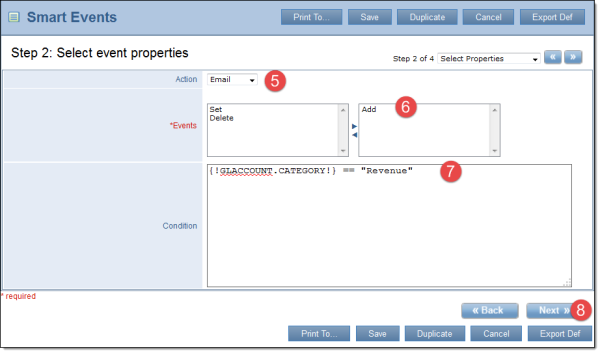
6. Highlight and include the Event: ADD
7. Add the following Condition: {!GLACCOUNT.CATEGORY!} == "Revenue"
a. This condition tells the system to only notify you when the GL Account’s Category is set to Revenue.
b. To have the system email you when any GL Account is added, regardless of the Category, leave the Condition field blank.
8. Click Next.
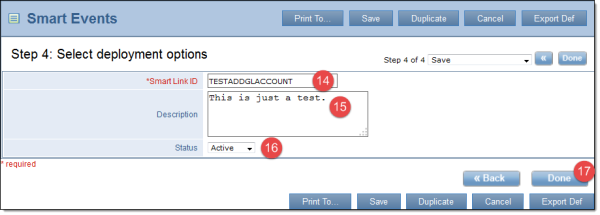
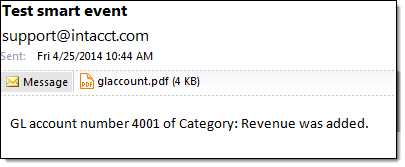
That’s all there is to it! Now, try adding a GL Account of Category “Revenue” and check your inbox. Moments later you will receive an email like so:
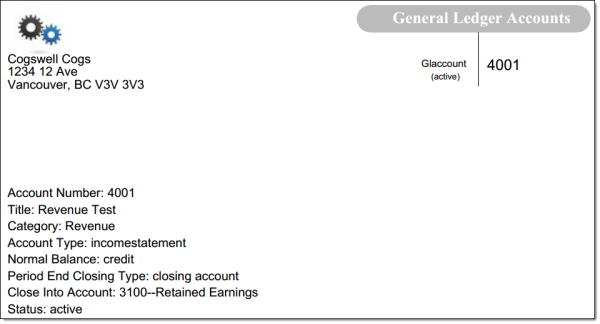
And the attached PDF will look something like:
If you wish to learn more about our Intacct Cloud solution please Contact us today!